- Author:
- Leslie James
- Subject:
- Computer Science, Cross-Curricular, Virginia History
- Material Type:
- Lesson
- Level:
- Upper Primary
- Tags:
- License:
- Creative Commons Attribution Non-Commercial Share Alike
- Language:
- English
- Media Formats:
- Downloadable docs, Video
Day 2 code example
Day 4 coding example
Exit Ticket - Part 2
Exit Ticket - Part 3
Exit Ticket - Part 4
Final Reflections
https://www.youtube.com/watch?v=oGdZ9s8Esas
Peer Feedback Form
Test and Debug Exit Ticket
Use Events Tutorial
Virtual Field Trip in Scratch Planning Sheet - Regions of VA
Virtual Field Trip Project
Virtual Field Trip in Scratch Remix (Regions of Virginia)
Overview
During this unit, students will take you on a virtual field trip through one of the regions of Virginia. Along the way, they will use CS concepts like events to switch scences and sprites and sensing (conditions) to add interactivity.
Overview
CS concepts covered
storyboarding, iterative design, decomposition, citing sources, events, conditions, debugging, collaboration
CS integration
Any subject area
What students will do
Design a virtual field trip through a storyboard
Debug and problem solve
Provide feedback to each other and reflect
What students will figure out
How to rely on peers for debugging support
How to make an engaging and interactive field trip
How to demonstrate their learning in another subject area by creating tech
Project at a Glance
Part | Duration | Lesson Summary | Materials |
1 | 45-60 min | Make a plan | |
2 | 45-60 min | Set up your sprites and backdrops | Tutorial - How to Insert Backgrounds and Sprites
|
3 | 45-60 min | Use events to switch scenes & sprites | Tutorial - How to switch scenes and sprites
|
4 | 45-60 min | Use sensing to add interactivity |
|
5 | 45-60 min | Test, debug and wrap-up | |
6 | 45-60 min | Feedback and reflect | Sticky notes for feedback, a place for journaling whether online or on paper
|
Materials preparation
Part 1
Print out Virtual Field Trip Planner for each student or pairs
Parts 2-5
Make sure students can locate Scratch on their computer and that they know how to access the tutorials
Students should have access to the exit ticket for each day (either on paper or electronically) that can help you track engagement and troubleshoot problems.
1 - Make a plan
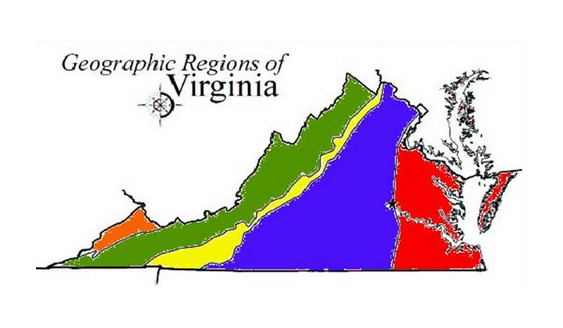
The goal for part 1 is for students to plan out at least 3 important places in their region that they want to visit in their field trip. This could be a specific place (example - visiting a specific beach in the Coastal Plain) or a more general place (example - visiting the bay or ocean for the Coastal Plain)
Update and print out the Virtual Field Trip Planning form or share electronically through Google Classroom.
2 - Set up your sprites and backdrops
Watch video tutorial and then work on gathering/creating your sprites & backdrop images.
Choose a tour guide (sprite) from the Scratch library or create your own by uploading an image into Scratch.
Use google search to find images for each place that you will be visiting and a map for the starting page. Save these images to your computer so that they will be easy to find when adding to your project.
*Be sure to copy website URL into your Image Citations at the bottom of your planning doc
Add images into your Scratch project (go back to the video tutorial if you need help)
*The tutorial is not specific to the Regions of VA project, but will still show you how to insert backgrounds and your tour guide.
3 - Use events to switch scenes & sprites
Finish gathering/creating images for your sprites & backdrop images.
You should have a different backdrop for each different place. You can change your tour guide as you travel through your field trip or you can use the same one. Be creative!
When you are done with that, watch the video tutorial and then start coding events into your project. You can find example code here. Remember this is an example of a virtual field trip, but this example isn't about Virginia.
4 - Use sensing to add interactivity
Finish working on switching scenes and sprites. When you are done with that, watch the video tutorial and then start coding interactively into your project. You can find example code here.
5 - Test, debug and wrap up
Wrap up your project by testing and debugging it. If you think you are done, find someone else who is too and give each other "I like" and "I wish" feedback. Be sure to be specific about the feedback, so it's easy to know what's working and what needs to be updated.
6 - Feedback and Reflection
Two important parts of creating a CS integration project is getting feedback and reflecting on the lessons learned.
Feedback prompts:
Before starting the feedback session, spend a few minutes in a class discussion about feedback. What makes it useful? Specific and actionable. What makes it not useful? Generic and personal.
I like ....
I wish ...
Reflection prompts:
What did I find challenging about this project?
What went well for me with this project?
What could I improve the next time I do a project like this?