- Author:
- VCU STEM Project 3, VCU STEM Project 1, VCU STEM Project 2
- Subject:
- STEM/STEAM, Science, Force/Motion/Energy
- Material Type:
- Lesson Plan
- Level:
- Upper Primary
- Grade:
- 5
- Provider:
- Virginia Commonwealth University (VCU)
- Tags:
- License:
- Creative Commons Attribution Non-Commercial
- Language:
- English
- Media Formats:
- Text/HTML, Video
Education Standards
Explore Phase Recording Sheet
Friction
Overview
After experiencing this module, students should understand that friction is a force that opposes motion (SOL 5.3e). This lesson was written with an inclusive fifth grade classroom in mind, but can be adapted for a smaller pull-out group if necessary. This module was developed by Karin Kaerweras part of a Virginia Commonwealth University STEM initiative sponsered by the Virginia Department of Education.
Introduction
After experiencing this module, students should understand that friction is a force that opposes motion (SOL 5.3e). This lesson was written with an inclusive fifth grade classroom in mind, but can be adapted for a smaller pull-out group if necessary. Using the 5E lesson format, this lesson begins by capturing the students’ attention using a video about epic water slides. Students will notice that the water slides go “fast” or “slow” and will start making predictions about how they work. After this introduction, students will explore the concept of friction by using gloves made of various materials to play toss and catch. The gloves will either increase friction or decrease friction, but students will not use this terminology until the explanation phases. Once students have explored the concept of friction, the teacher will use the materials to explain how friction affects objects. Students will actively engage in testing materials as the teacher explains the concept. Students will then be engaged in scientific inquiry. Students will be tasked to find a material that makes a road less “slippery,” thus increasing the friction. They will design their own experiment while ensuring that it is “fair.” Eventually, they will choose the material they think increases the friction on the road the best. Lastly, students will be evaluated by watching a video that explains a slip-n-slide game and be tasked to recreate the game with friction as the star. The teacher will be able to gauge the students’ understanding of the concept on whether the game description accurately depicts friction.
Before engaging in this 5E experience, students should have already learned SOL 5.3a-d. It is important that students are comfortable with the notion of kinetic energy (movement energy), how motion is described, how changes in motion occur, and what happens when objects collide. Knowledge of these standards will help students articulate what is truly happening when witnessing friction.
Materials used for this lesson:
Engage
Video and science journals
Explore
Put students in groups of 4 and provide students a basket with the following items:
Round, slippery fruit such as grapefruit
4 pairs of Rubber or latex gloves (be sure to check for latex allergies if you choose to use latex gloves)
4 pairs of Leather gloves
4 pairs of Cotton gloves
4 pairs of Snow gloves
Recording sheet for each student (provided at end of lesson)
*I recommend asking your team and school staff to lend you gloves for this activity. You will not do any sort of damage to them while doing this investigation. If you can’t obtain several pairs of each type of glove, you can rotate the ones you are able to obtain. Another option is to use one of each type of glove per team so that each child wears one glove during the throwing/catching part.
Explain
One rubber or latex glove for each student (or have students take turns if you don't have enough). These will need to be disposed of when finished.
Lotion (you can just squirt some on each hand, no need to have separate bottles)
Baby powder or flour (again, sprinkle on each hand)
Use gloves from explore phase if you need more examples
Elaborate
Materials for ramps (books, wooden blocks, whatever you have)
A toy car for every group
The following materials cut into congruent squares
Sand paper
Cling wrap
Wax paper
Aluminum foil
Paper towel
Cloth towel
Whatever else you have to test for a road surface
Tape to get material flush with the floor
Lab sheet (provided at end of lesson)
Evaluate
Video and science journals
Engagement
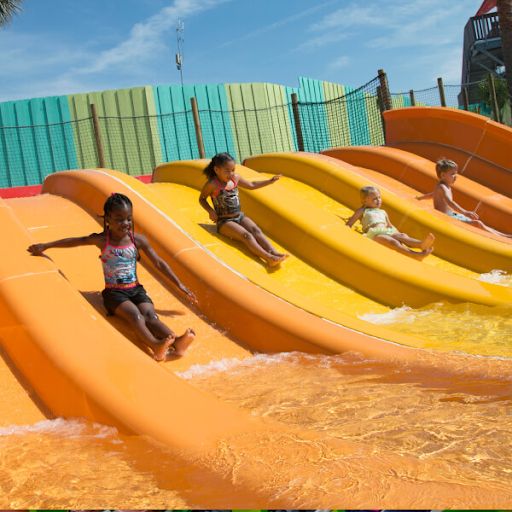
Show the following clip (or one like it) about epic water slides to the class.
https://www.youtube.com/watch?v=hVwQwO7CTzw
While watching the video students should be journaling in their science journal. Guiding questions should include:
Which slide seemed to be the fastest?
Which slide was the most exciting?
Did any slides seem slow? What makes you think that?
Did any riders get “stuck” while going down a slide? What did you observe that makes you think this?
Would anyone like to share an experience you’ve had with a water slide?
Exploration
Put students in groups of four.
Provide each group with a basket of gloves and fruit as described in the materials list as well as the recording sheet provided at the end of this lesson.
Within each group, students pick a partner to play toss with.
Round 1: Toss the fruit back and forth with bare hands.
Round 2: Toss the fruit back and forth with rubber gloves on.
Round 3: Toss the fruit back and forth with cotton gloves on.
Round 4: Toss the fruit back and forth with leather gloves on.
Round 5: Toss the fruit back and forth with snow gloves on.
As students complete each round, they should refer to their recording page for directions. (See attachment.)
Finally, at the bottom of their recording sheet, they will list which gloves made catching easier and harder.
Ask students if there are other types of gloves they have worn or seen, discuss how these gloves might function in the experiment.
Explanation
1. Have students share their experiences throwing and catching the fruit as a group, then have a representative from each group share with the class.
2. As students start explaining using descriptors such as “hard to catch,” “slippery,” “grip,” keep a list on the board or chart paper. The teacher may need to help students articulate using these descriptors.
3. Ask students to help you categorize these descriptors into two columns- words that describe a slippery toss/catch experience (less friction- but don’t write the word friction yet) and words that describe good grip (more friction- again, don’t introduce the term yet.)
4. Write on the board, “Friction is a force that opposes motion.” Tell students that your two lists on the board each have a title “Less friction” and “more friction.”
5. Have students discuss in groups which heading belongs with which list. Students will then share out their predictions and come to a conclusion.
6. Tell students to glide their hand over the desk. Discuss how it feels. Have them dip their hand in the flour or baby powder and do the same, describe the difference. Reiterate here that when you first rubbed your hand across the desk, it had “more” friction. When you added the powder, it reduced the friction, like the water on the water slide (connection to engage.)
7. Next tell the students to put on a rubber glove (students will need to share and take turns). Have them glide their hand over the desk (after it has been wiped clean). Have students put lotion on and repeat. Have students describe how friction slowed down their hand and which scenario reduced the friction.
8. You can repeat this explanation with other gloves if students need more examples.
9. Ask students if they have ever had a problem at home with friction, how does friction help them in their lives. (For example: slippery floors, noisy door hinges, stuck jar lids…)
Elaboration
Crash Test Lab
Explain to students that you just got a call from the Virginia Department of Transportation. They think the roads in Virginia are too slippery. They want to know which surfaces are best for slowing down cars.
Students will be tasked to design an experiment where they will release a toy car down a ramp that gives the car enough speed to hit the wall beyond. They will then test various materials to see if they can slow down the car before it hits the wall.
Give students the materials they will work with (as described above in the materials section).
Before they can begin testing road surfaces, remind them that they have to make the experiment fair. In order to make the experiment fair they need to keep the following variables controlled:(you may want them to generate this list on their own, or scaffold as necessary).
The ramp must be the same for all trials
The ramp must stay the same distance from the wall
The car must be the same
The materials must be taped to the floor the same so that the car doesn’t get stuck on the lip of the material.
Etc…
Release students to make their ramp. Walk around the room and make sure their controlled variables are in place.
Have students write up their experiment using the lab sheet (see attached).
Allow students to test.
Have students share their findings with the class.
Evaluation
Show the following youtube video about a slip and slide game:
https://www.youtube.com/watch?v=PfY2x9sycPw&t=138s
The video is 10min so if time is limited pick a small portion to show the students.
Have students design their own game testing friction. The game can be whatever they want, but they have to explain how friction is the focus. They must also use terms such as increase/decrease friction, etc. They can use drawings with captions, or just explain using text.
If you need to provide scaffolds for students here are some sample ideas:
- Slip and slide race-- each player chooses a substance (ketchup, mustard, soap, whipped cream) and spreads it on the slip and slide. Whoever slides past the finish line first wins.
- Same as above but send an object down the slip and slide instead of a person.
- Dry slip and slide- try to make yourself go fast without using any water.
Some additional options for "reinventing games" would look like:
Solve the problem of slippery footballs/ bad weather on the field (click for video)
Review
Module Review
Friction is a force that opposes motion. There are many types of materials that increase the amount of friction, slowing down the moving object. There are also materials that reduce friction so that the object can move faster. Students should have a deeper understanding as to how slip-n-slides and water slides work (a decrease in friction). Students have felt friction in investigating various glove materials and how they interact with a moving object. They should also have a thorough understanding of how and increase in friction can slow down an object i.e. the crash test investigation.
This lesson should situate nicely within your unit on force and motion. It is a concept that works well as a culmination of how objects move, change motion, and how motion is opposed.
I recommend that this unit take 3-5 days, depending on your length of class period. Here is a suggested schedule:
Day 1- Engage and Explore phase
Day 2- Explain phase
Day 3- Elaborate phase
Day 4- finish elaborate phase (if they were unable to share and finish the conclusive statement, the elaborate phase could take two class periods)
Day 5- Evaluation phase
Additional Resources
For more information about Virginia Commonwealth University's School of Education STEM initiatives, visit the Center for Innovation in STEM Education (CISTEME).